

How To Use Templates In Wpbakery Page Builder

WPBakery is one of the oldest and about well-known WordPress page builders out there. Released back in 2011, the plugin has close to 400,000 sales and powers countless WordPress websites to this day.
If you lot want to use this simple page builder to create advanced pages, here's our beginner'south guide to the WPBakery Page Builder.
Installing and Setting Upward WPBakery
WPBakery offers two single-payment licenses on its website : a regular $45 license for a single site and an extended $245 license for a SaaS application, both offer free updates and premium back up.You can download the plugin zip file later on purchasing a license and upload information technology to your WordPress website.
Activating the plugin will create a new WPBakery Folio Builder tab in your WordPress admin surface area and a Frontend and Backend Editor while editing pages and posts.
Caput to WPBakery Page Builder > General Settings . Here, you can select the Google font subsets bachelor to content elements. You can as well select the default templates for posts and pages. More than options will become available when you save them commencement.
In the next department, WPBakery Page Builder > Role Managing director , y'all can determine which features are accessible to the various roles on your website. For example, click "Ambassador" if you want to customize the administrator's part access. Select the "Custom" setting and enable the "Post" pick.
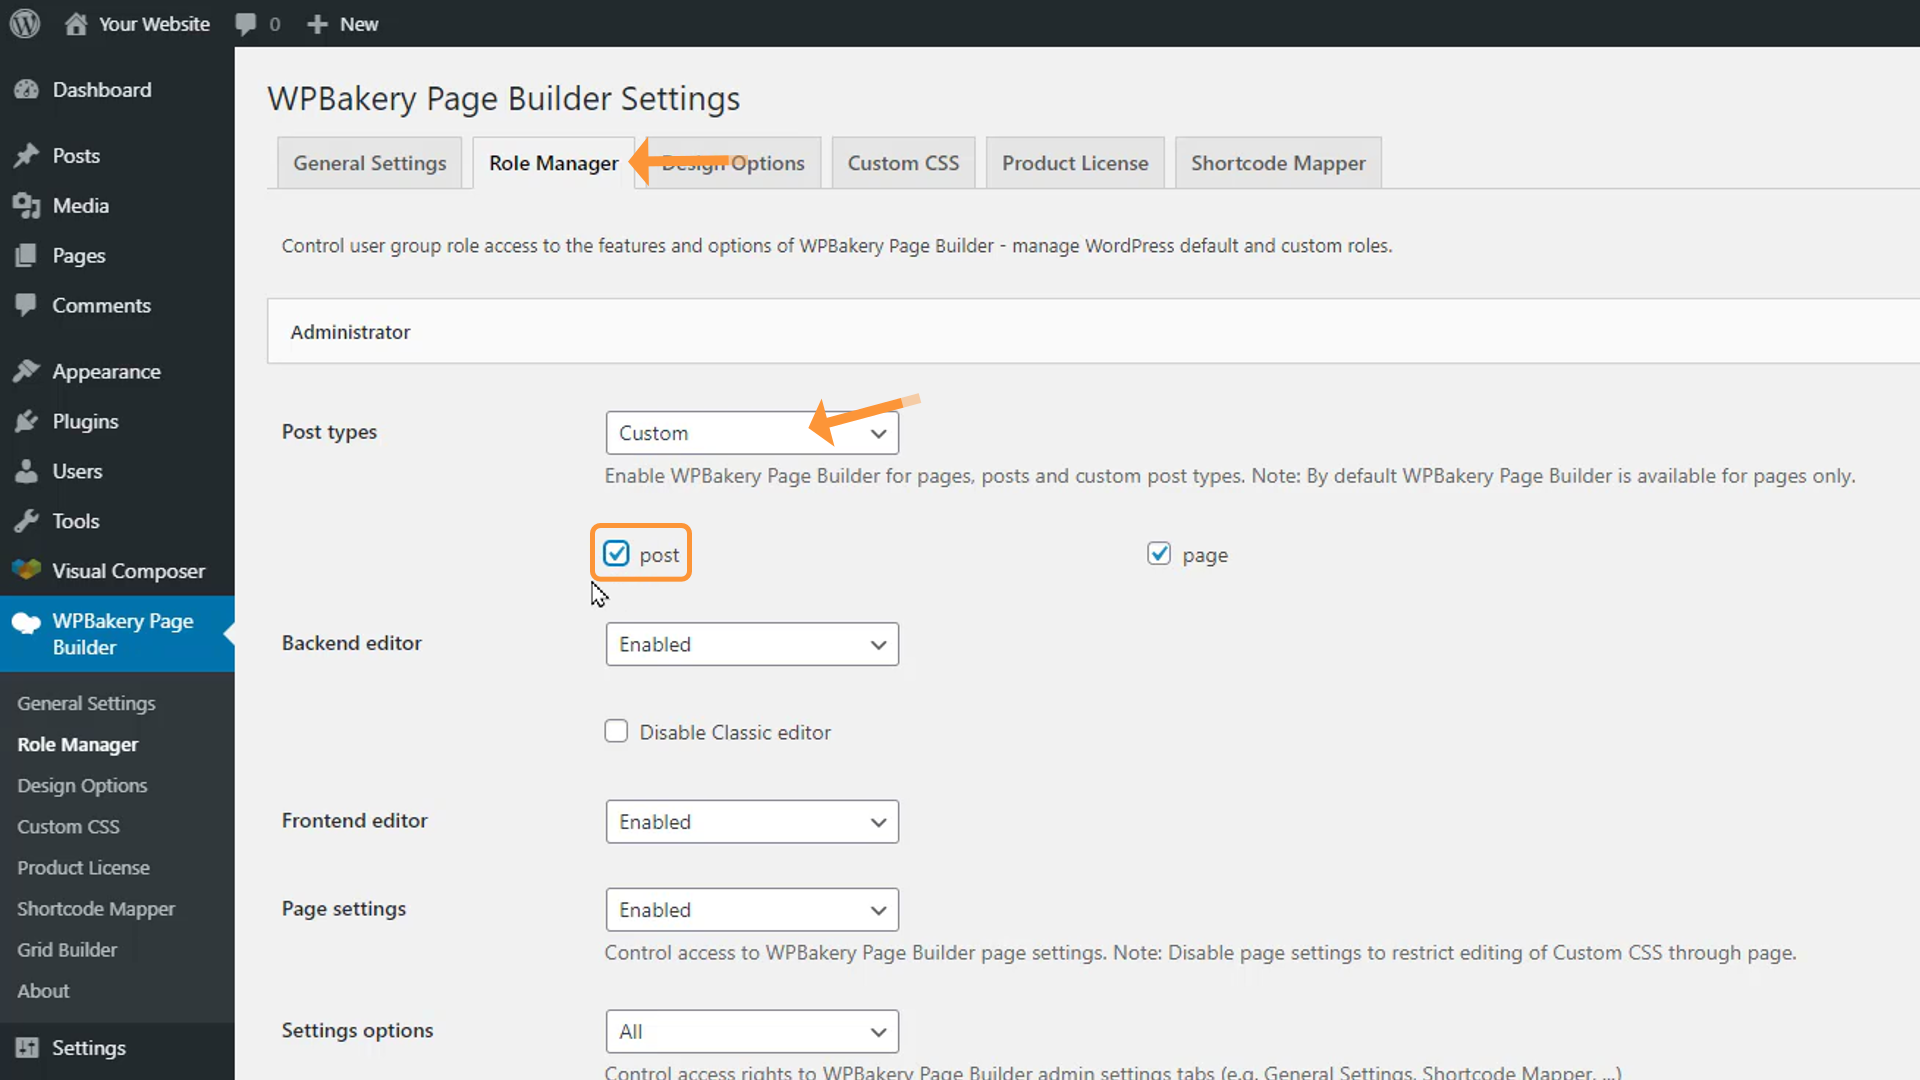
Below, you lot can enable or disable admission to privileges like the backend editor, frontend editor, page settings, settings options, templates, elements, grid architect, elements presets, and elevate and drop. Yous can similarly edit access for other roles like editor, writer, contributor, and store manager.
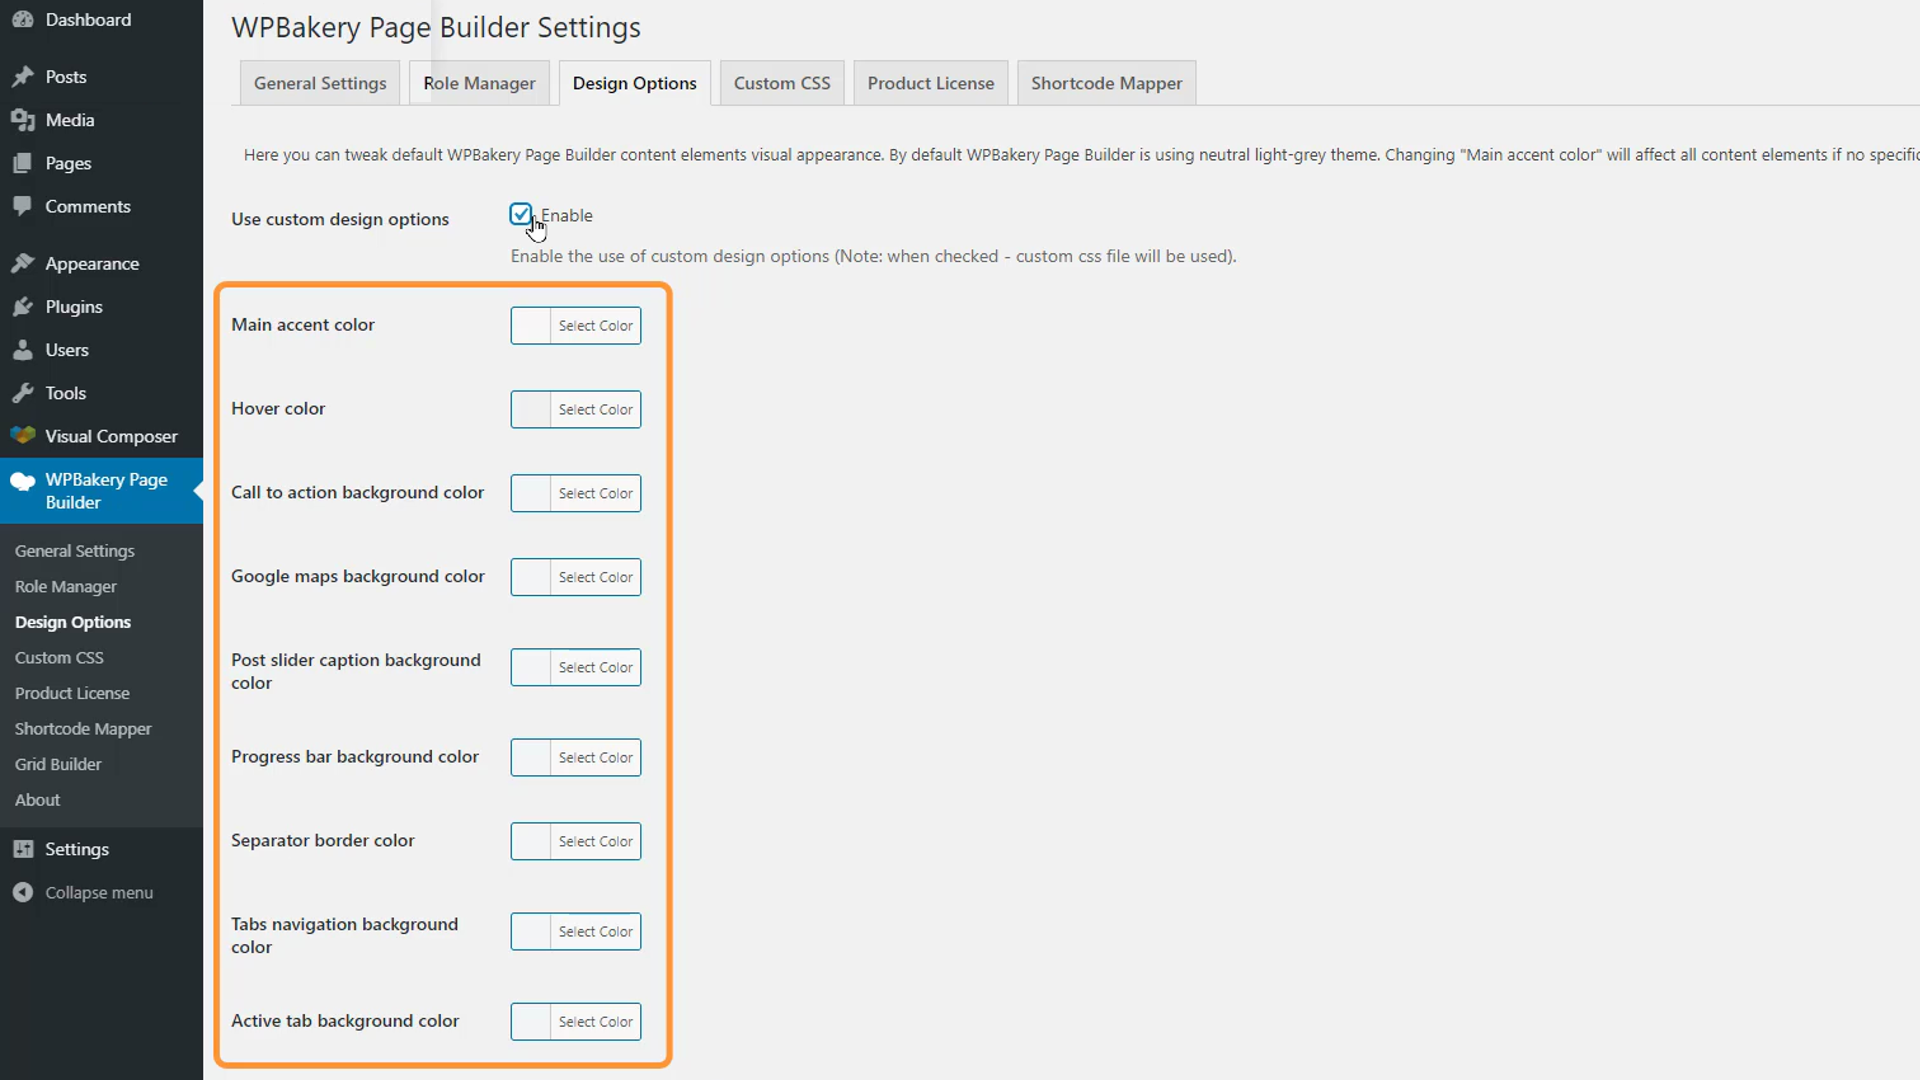
Next in line is the Design Options department. Past enabling the custom design options setting, you can select the default colors for various WPBakery Folio Architect elements similar hover, mail sliders, and separators. You lot tin likewise set the bottom margins for elements, horizontal spacing between columns, and screen width for mobile screens.
The Custom CSS section lets yous add custom CSS codes that control the appearance of HTML elements on the web page, while the Shortcode Mapper can add custom third party vendors shortcodes to WPBakery's content elements.
Folio Architect Layout, Elements, and Templates
Head to Page > Add together New to create a new folio. You lot can go to the Posts department instead if that'southward what you want to create.
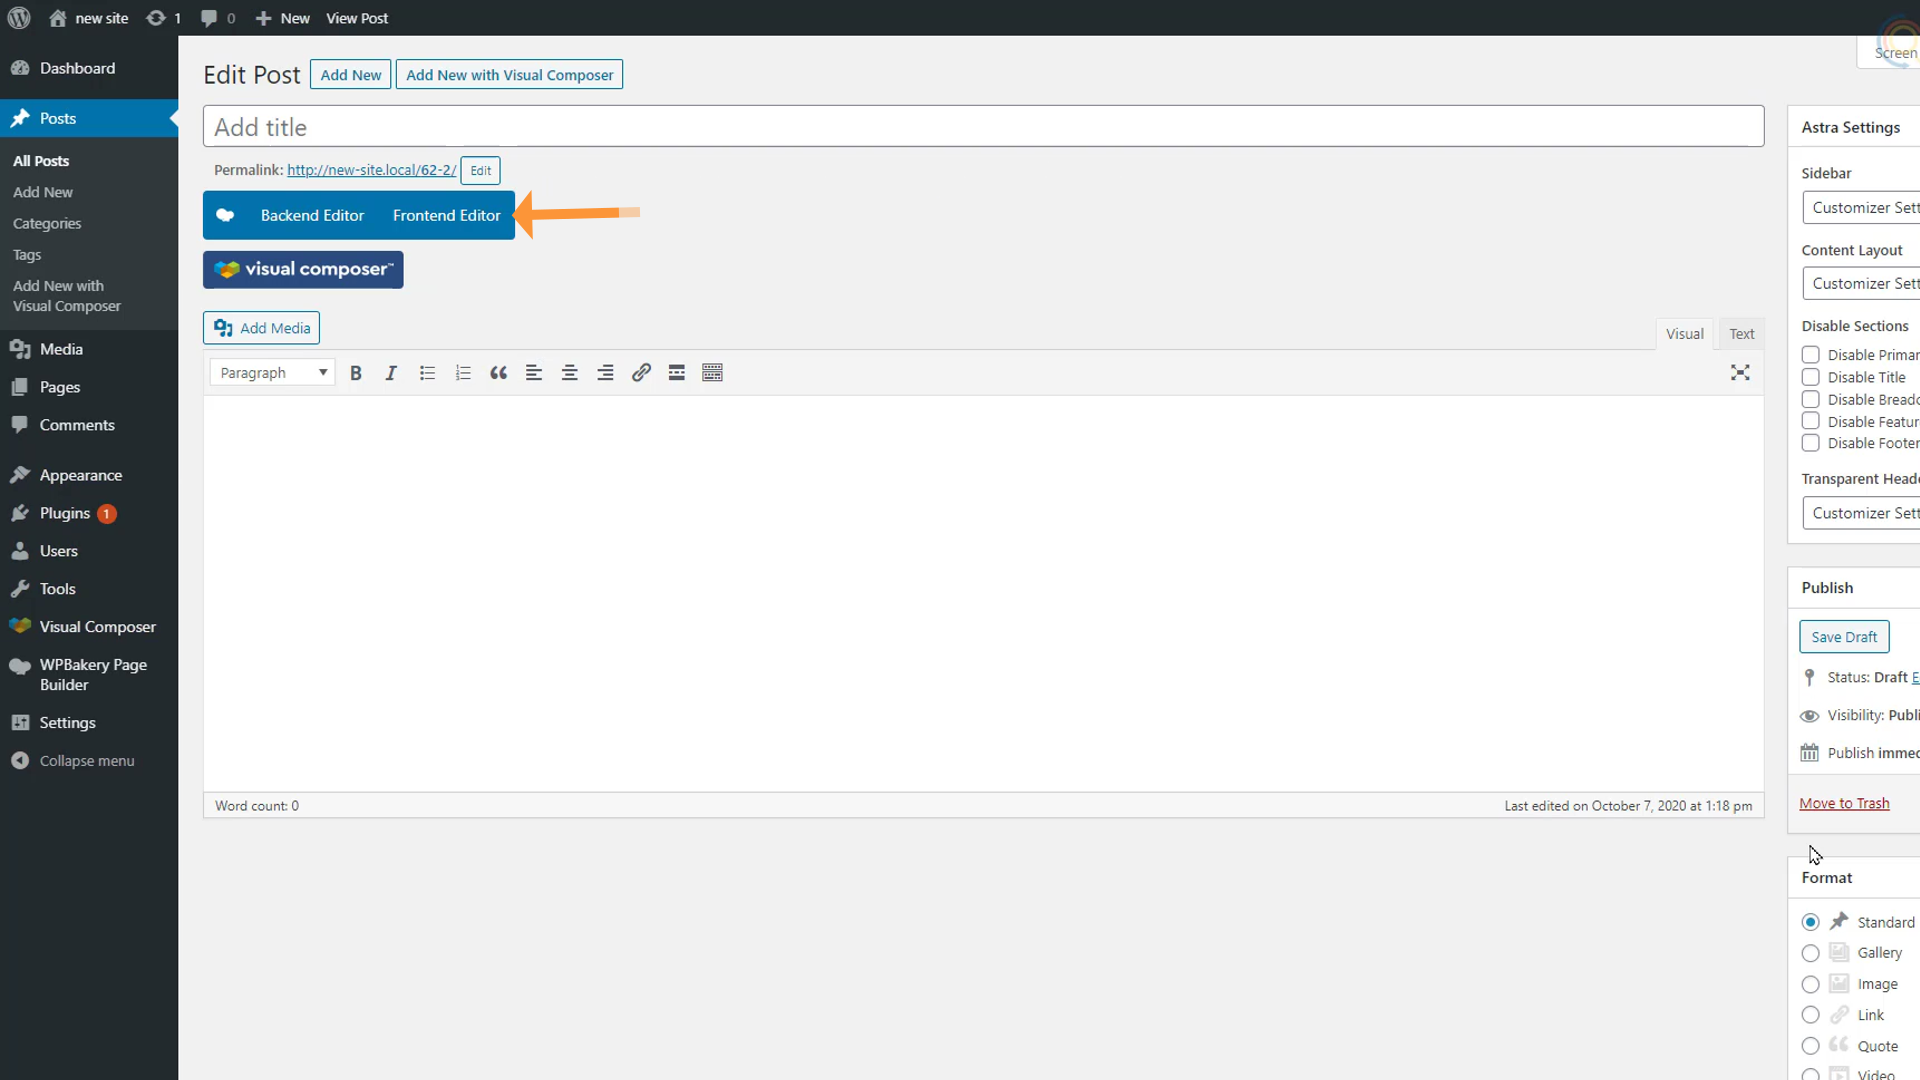
By default, the page opens up with the Classic WordPress editor. But y'all'll notice two new buttons under the title field named Backend Editor and Frontend Editor. You lot can use these buttons to access the WPBakery Page Architect. The Backend Editor lets you play around with a huge number of elements and templates to build the perfect folio. While the frontend editor offers a what-you-see-is-what-yous-get feel so y'all get exactly what you expect.
The layouts for both the backend and frontend editors are almost entirely similar. We accept a toolbar at the top while the editing area takes up most of the screen. The toolbar has the following options:
- The plus icon lets the states add elements to the page. Hither, you can as well access your saved templates and the template library.
- The gear icon lets u.s.a. add Custom CSS codes to the post.
- The preview button lets you preview your page on different screen sizes.
- The Backed Editor push button lets u.s.a. switch to the backend editor.
- The final ii buttons in the toolbar permit you save and publish the page.
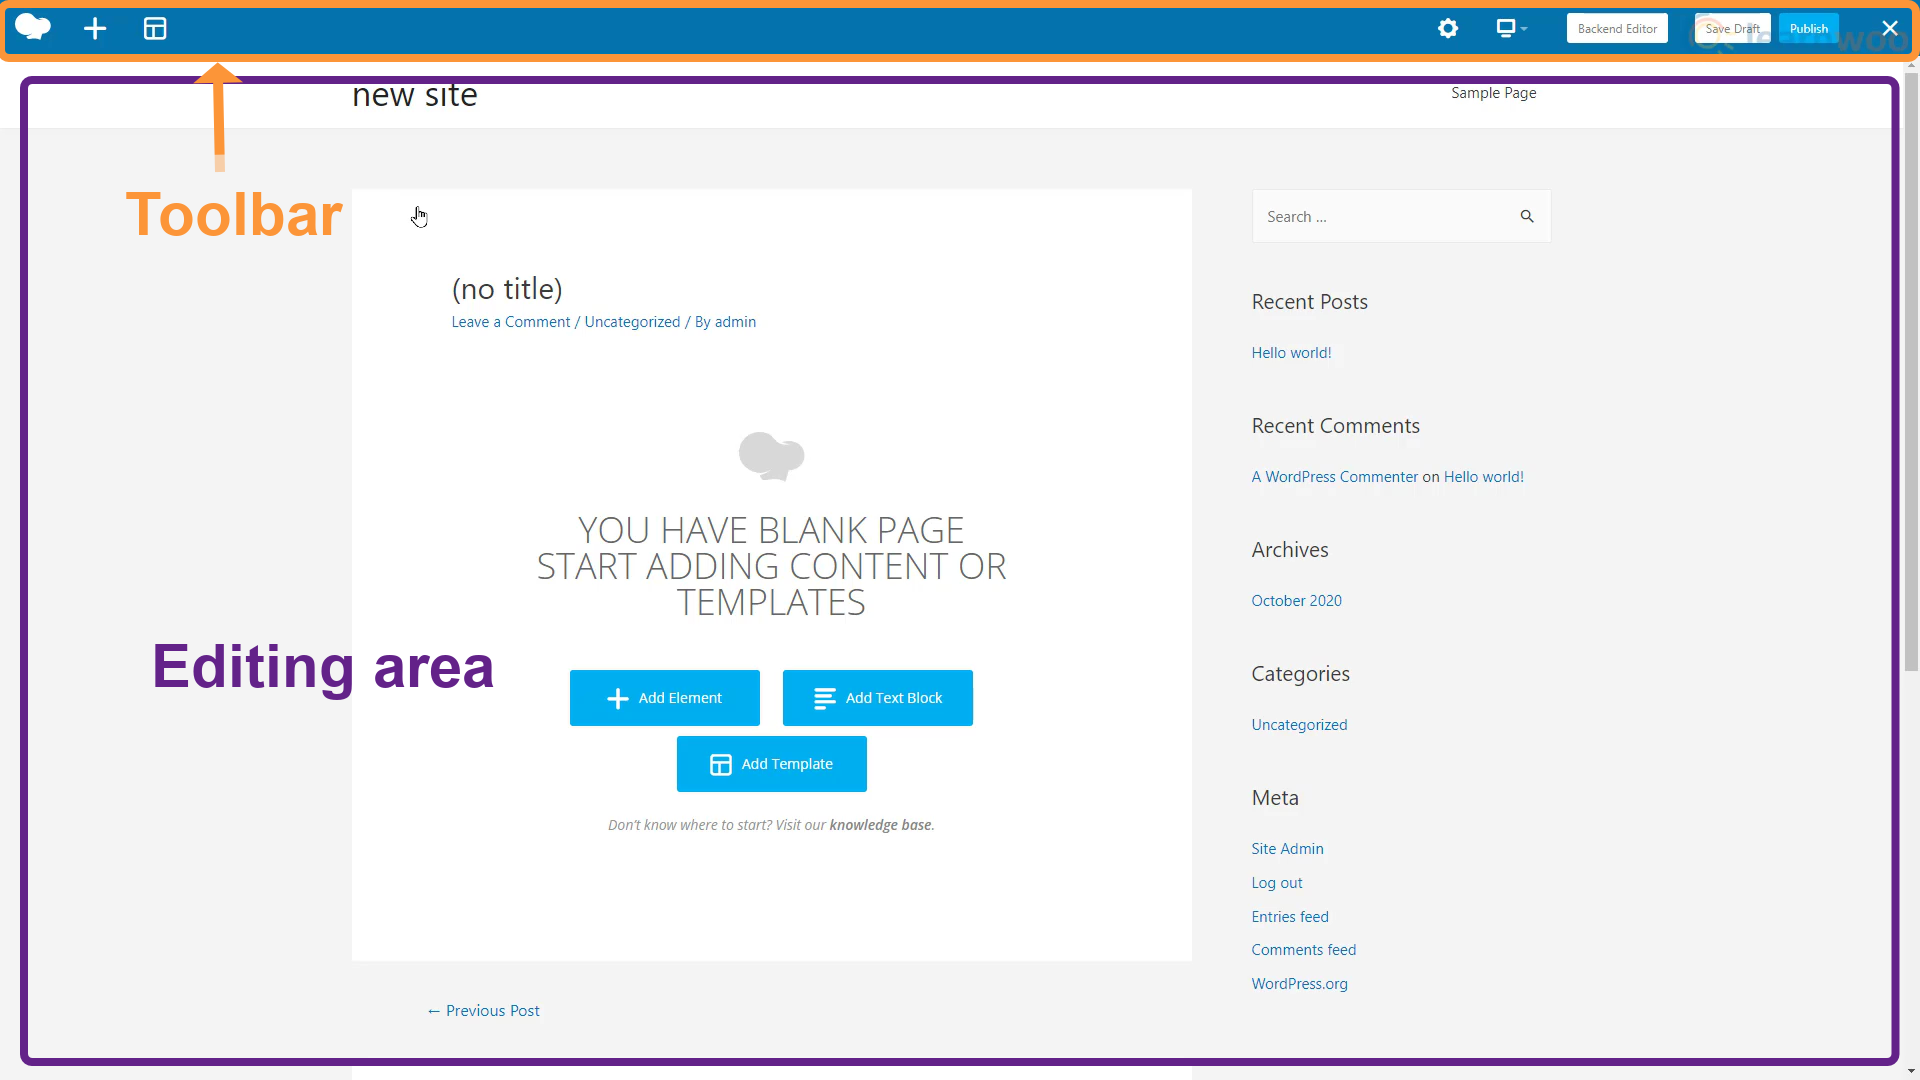
In the editing area beneath, we take three self-explanatory buttons to add an element, add a text block, and add a template.
We can choose from more than l elements like Row, Unmarried image, Video player, WP search, Widgetised sidebar, Button, Separator, FAQ, Custom heading, and more.
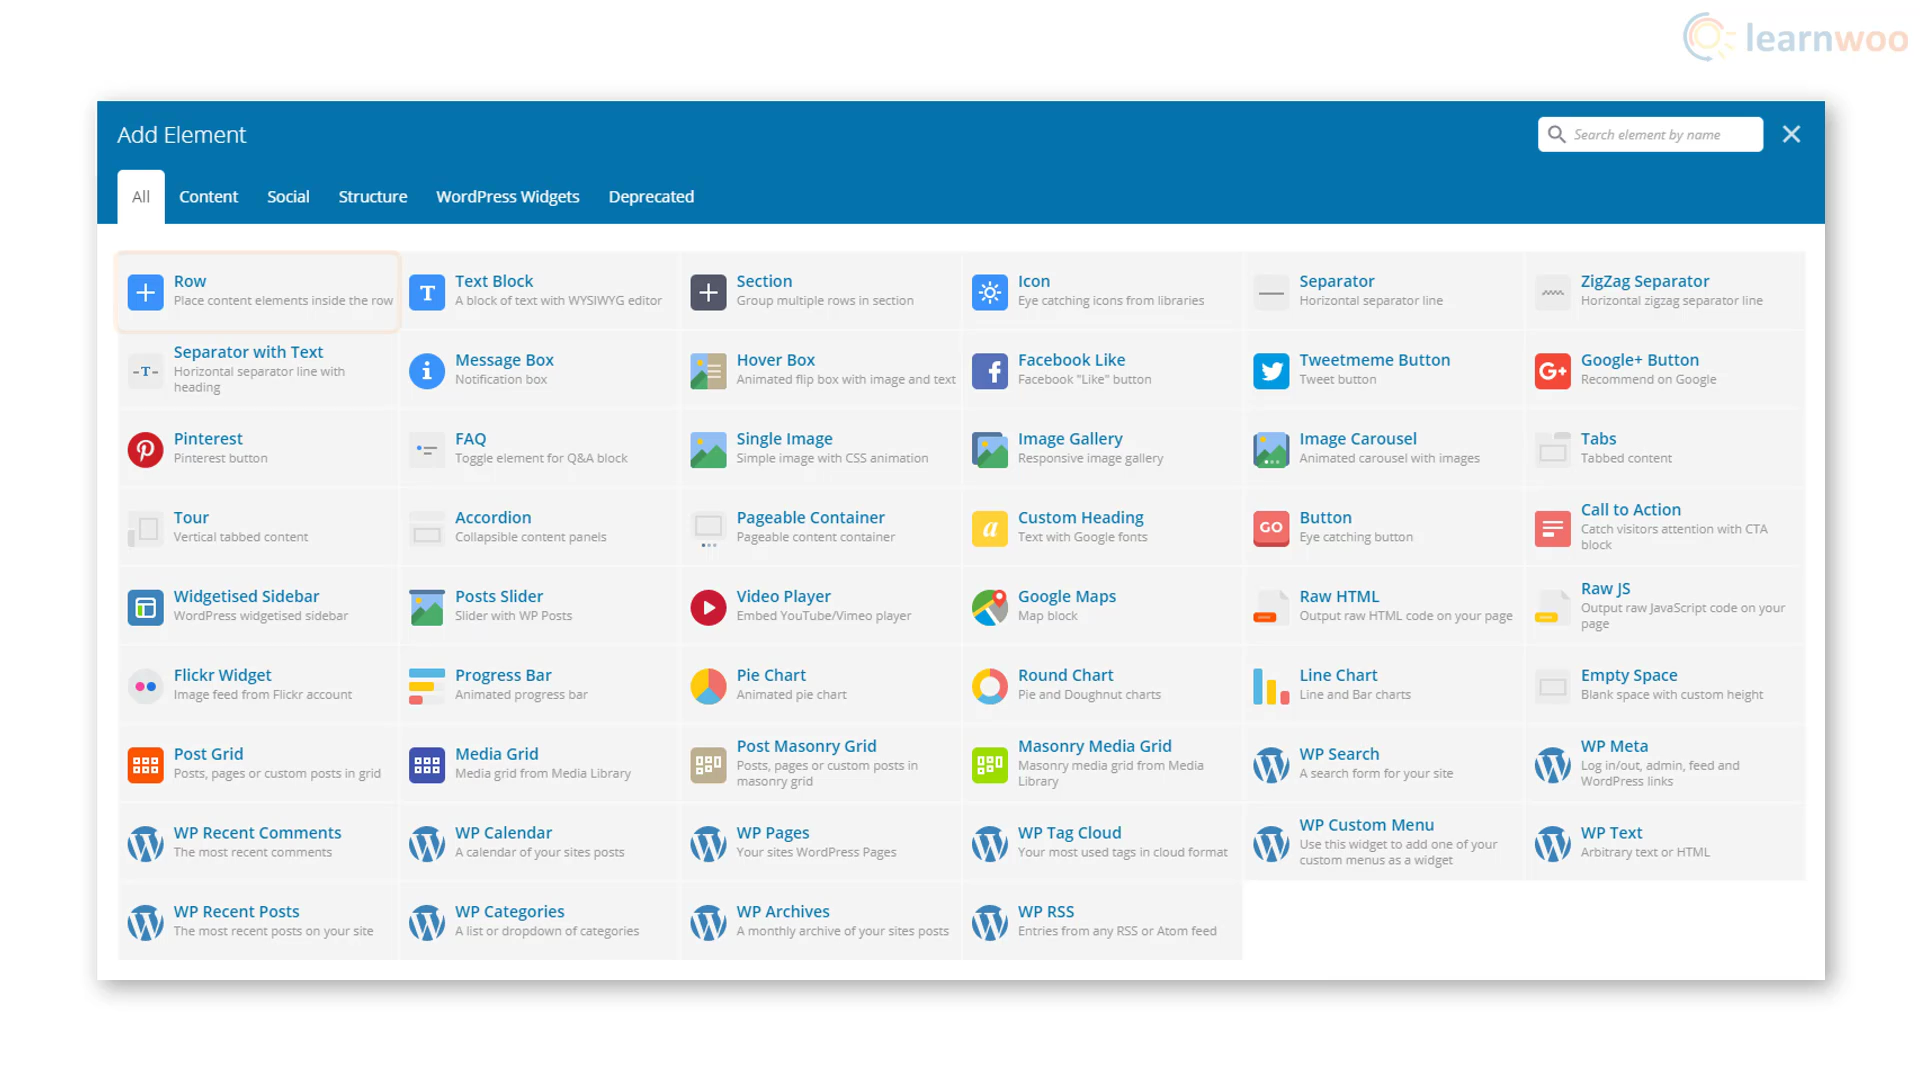
We tin can likewise choose from more than 85 folio templates to speed up our page building process. All templates can be imported with a click and are fully editable.
Edifice a folio with WPBakery Page Builder
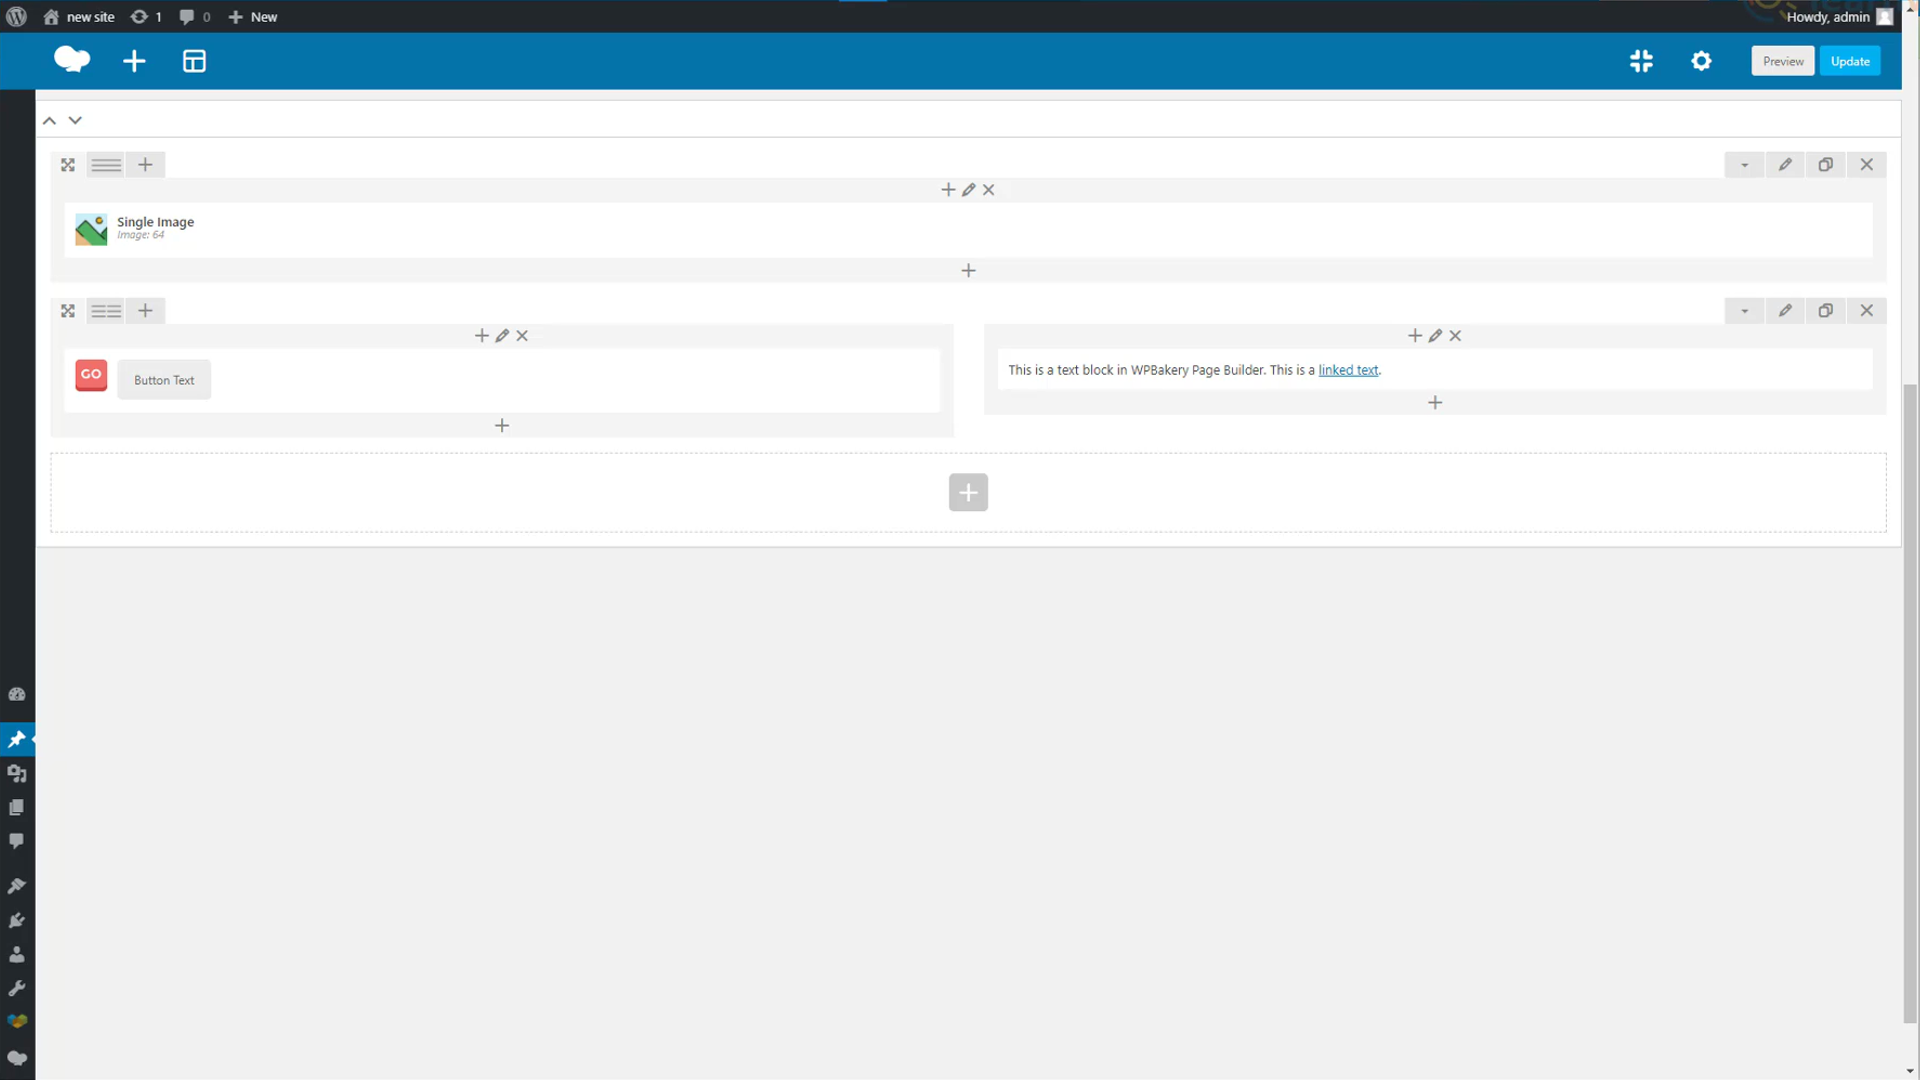
Building a page with the WPBakery Page Builder is simple. Offset past adding a title to the page by clicking "(no championship)". Type the page title in the popular-upwards. Then, click "Save Changes" and close the pop-up. Allow's create a simple page with an image, a text block, and a button.
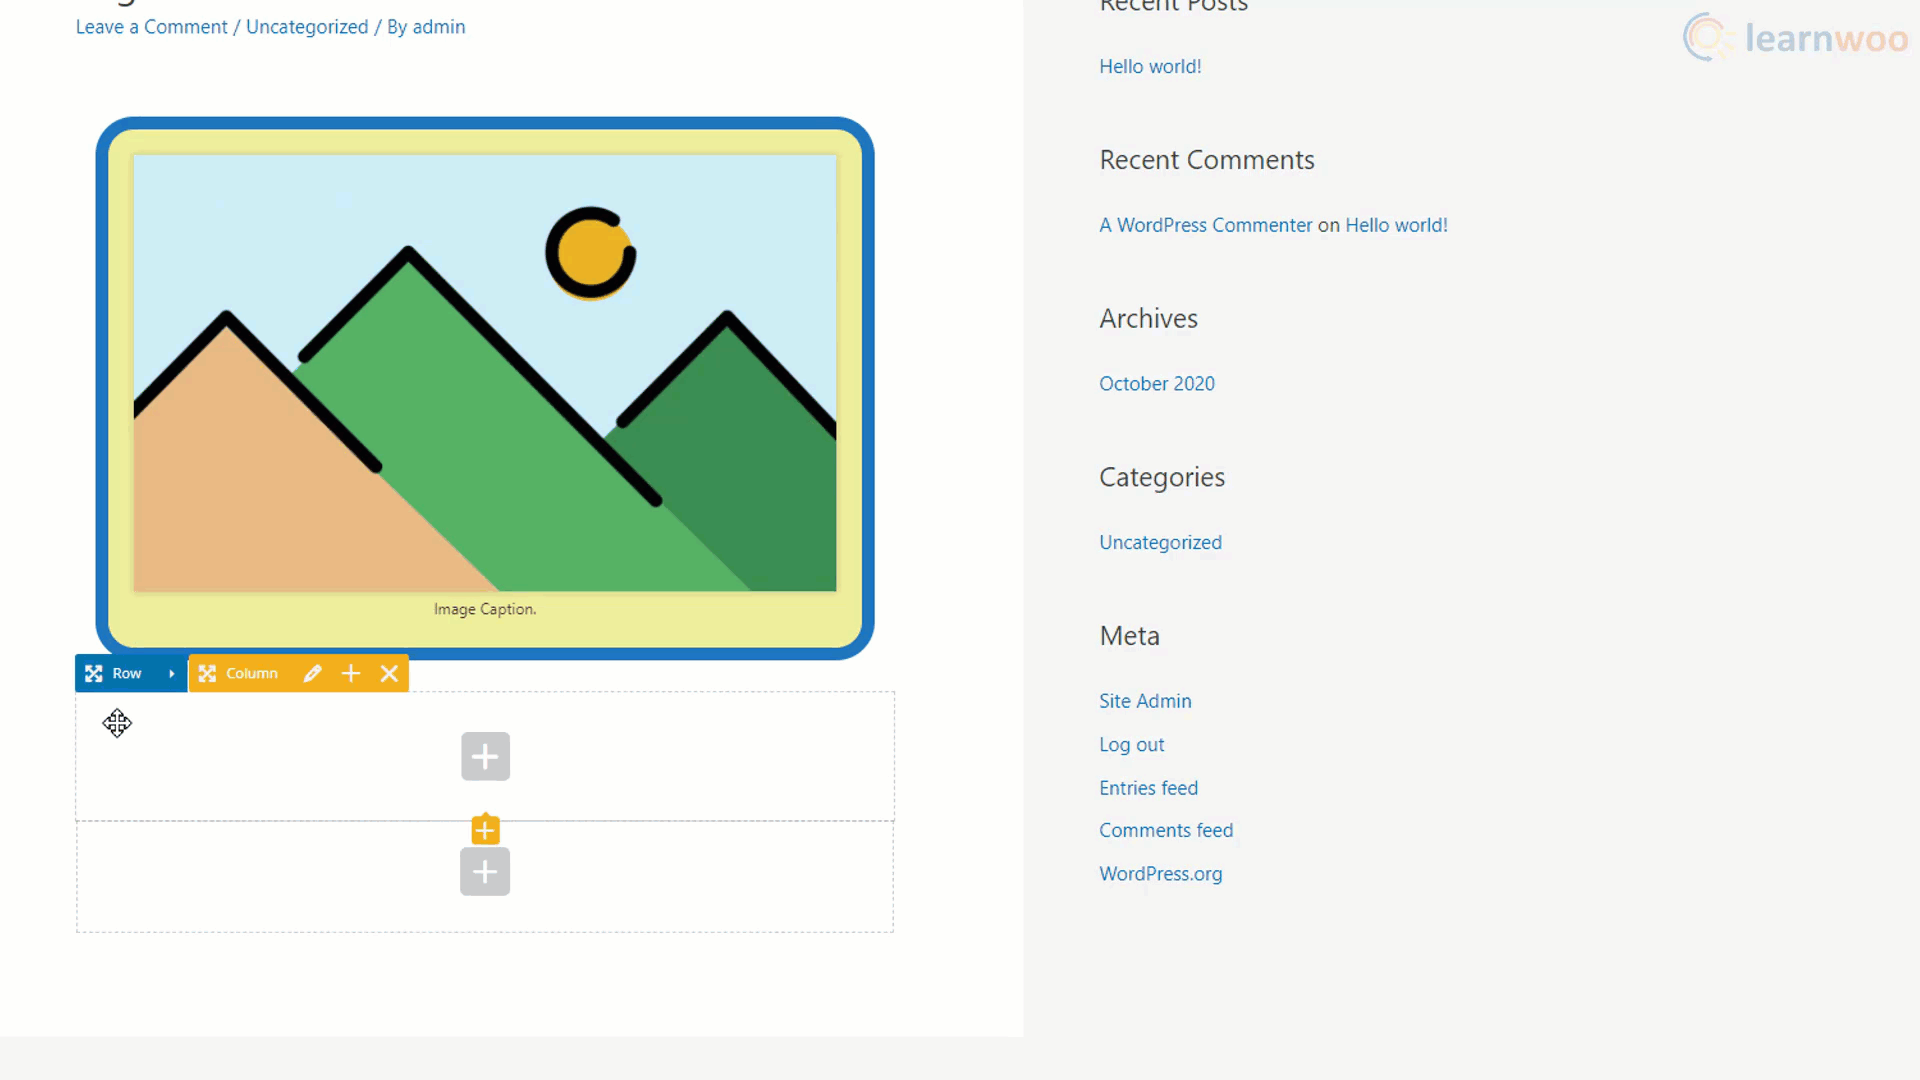
Adding an Prototype
To add an epitome, click "Add element" and select the "Single image" chemical element. A pop-up will appear with all the options available for the image with two sections: General, and Design Options.
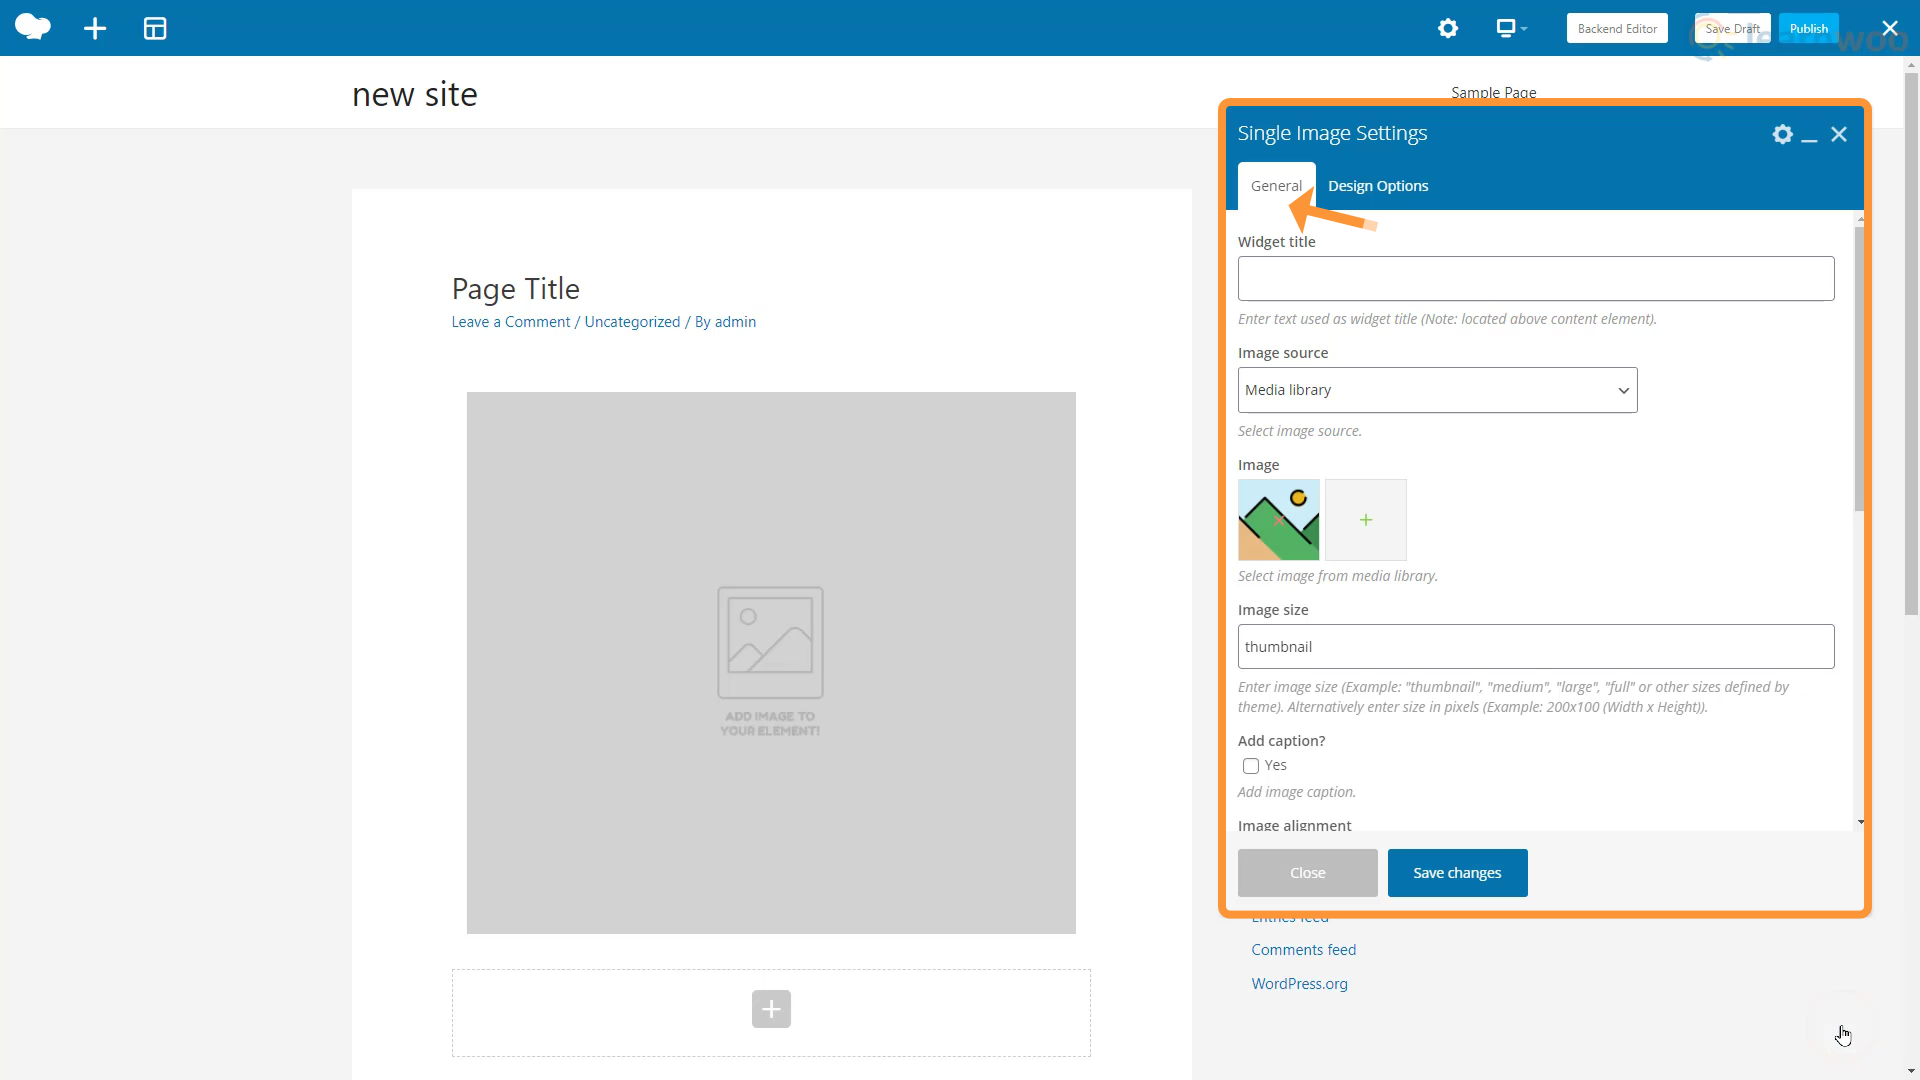
In the General section, you lot tin can add a widget title and upload the prototype from an external link or the media library. You can determine how much space the image takes on your webpage by using the Image Size setting.
The page builder supports iv sizes: Thumbnail, Medium, Large, and Full. Alternatively, yous can enter the size in pixels (Example: 200×100). You lot just need to blazon the size in the Image size field provided.
Below, yous can add a caption to the paradigm, choose it's alignment, and even select from a list of preset styles for it.
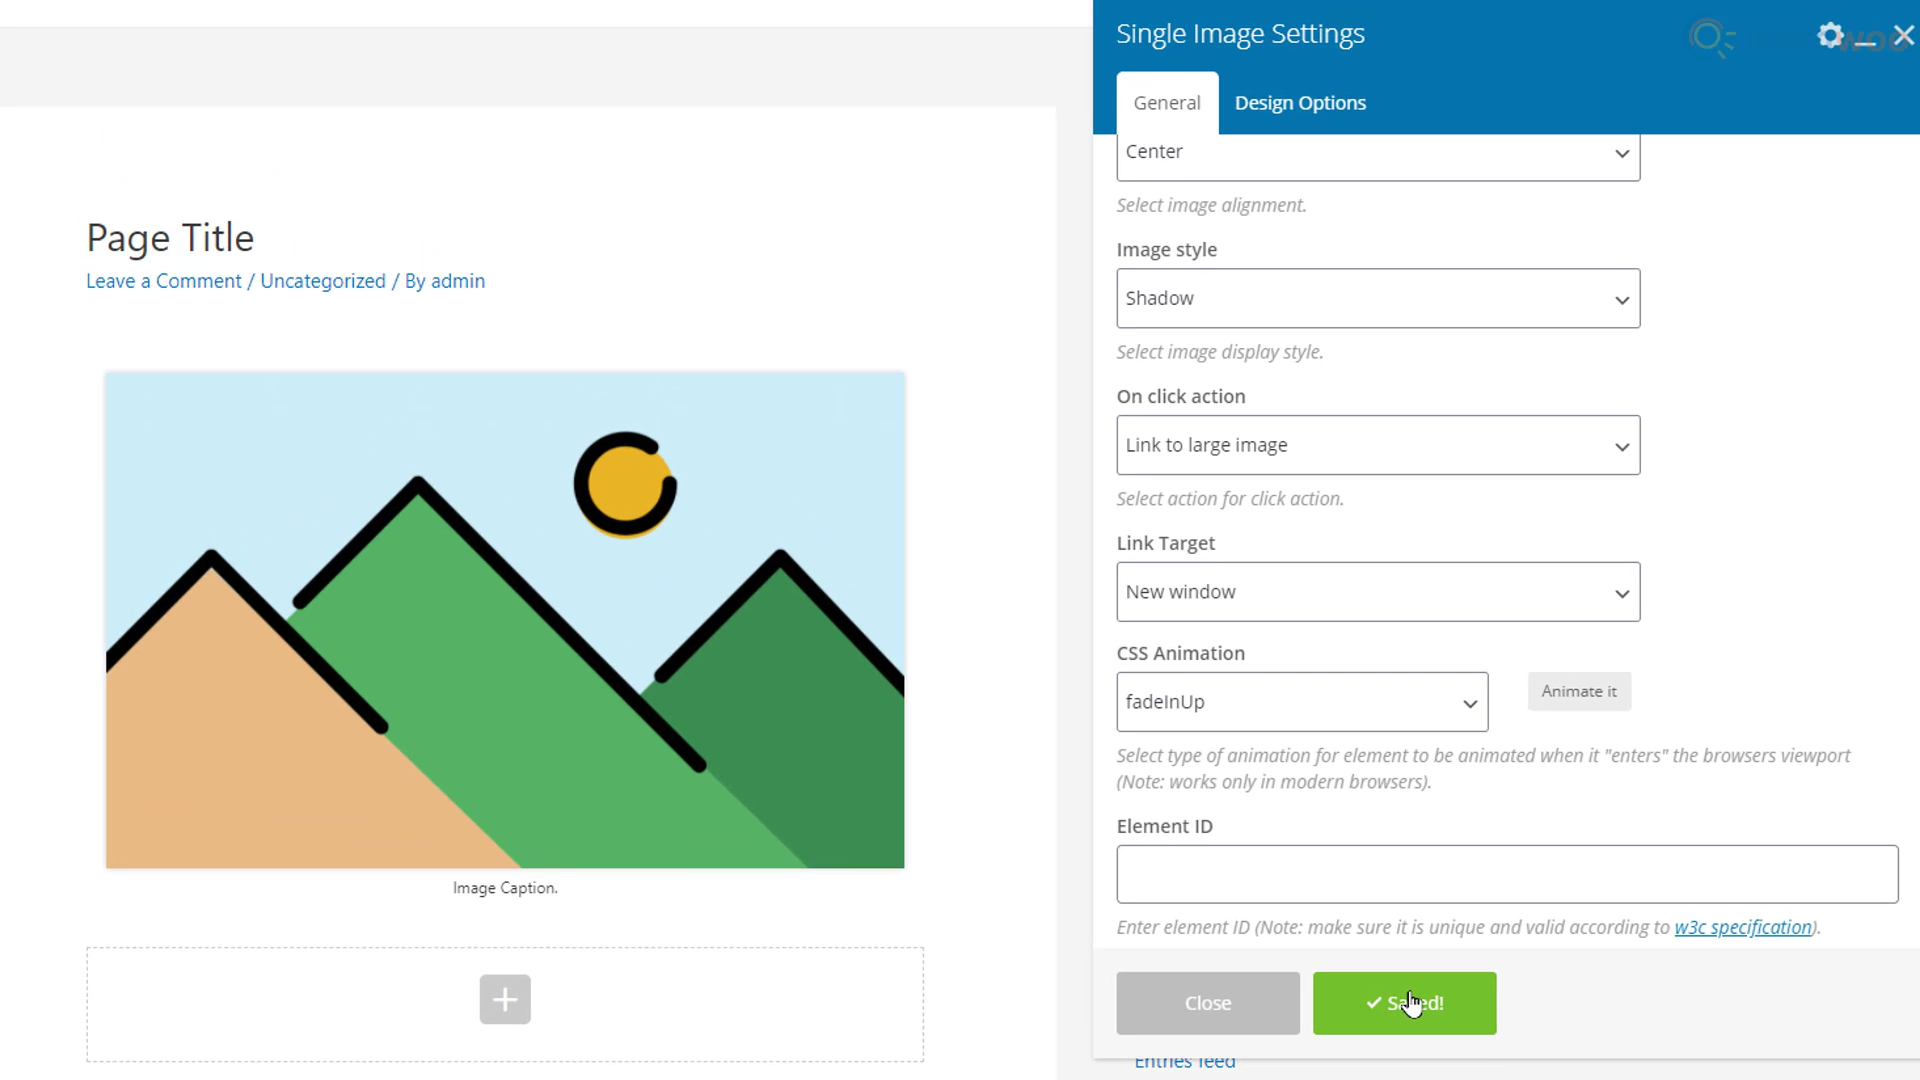
Y'all can choose an "On click action" for the image which volition accept place when a visitor clicks on the image. You lot can either link to a big version of the paradigm, open prettyPhoto, open up a custom link, or simply zoom into the paradigm. Of class, you can choose if the link volition open in a new window or not.
Finally, WPBakery Folio Builder lets you add together simple animations to elements like fading and billowy that can create a professional person wait.
In the Design Options department, you can create a border color, select a border manner and border radius, and set a background color for the paradigm. Yous can fix the exact padding, edge, and margin values for the element by using the fields provided.
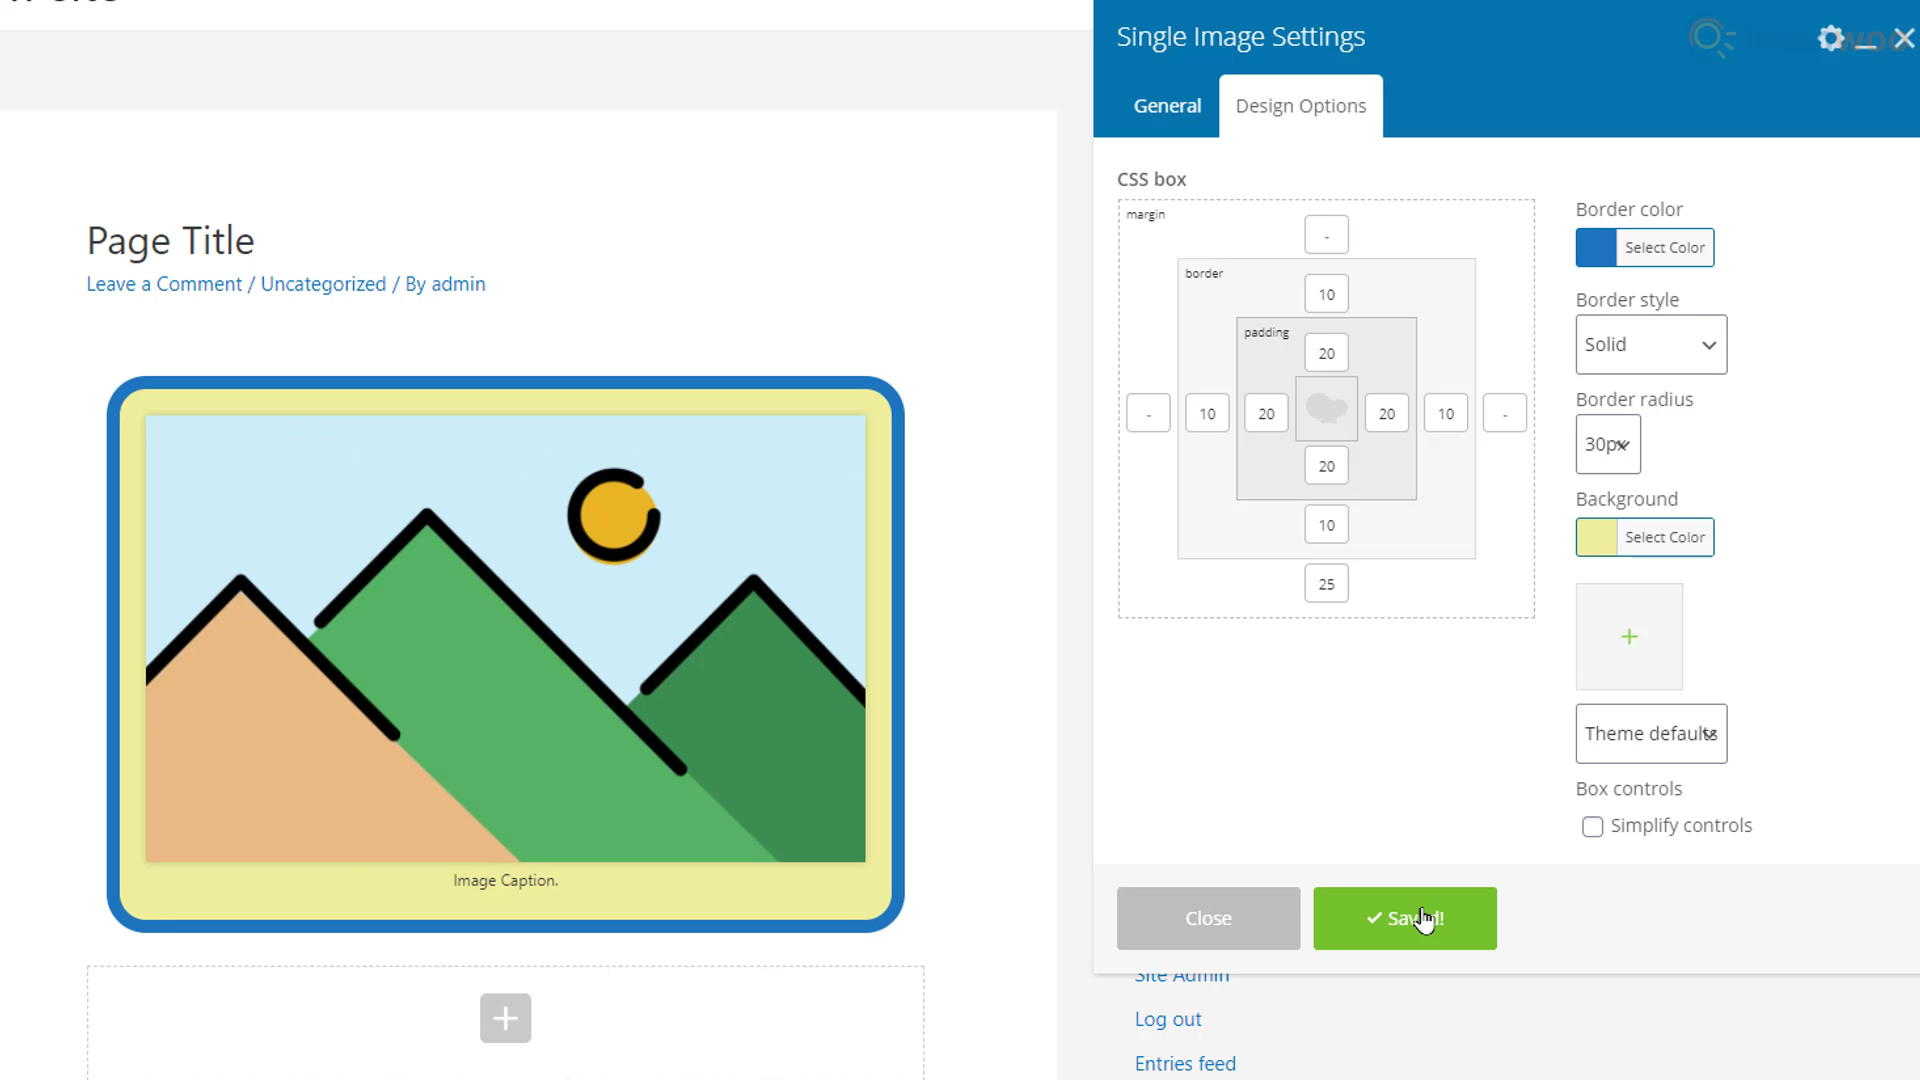
The padding is the space betwixt the epitome and the edge, while the margin determines the infinite between the border and the border of the page.
Adding Rows and Columns
In WPBakery Page Builder, elements are added with columns, which are, in turn, placed inside columns. This means, to add new elements, you demand to add a row and split it into columns outset.
And then let's add a row below the image by clicking the plus icon and selecting "Row" from the elements pop-up. When yous hover over the row, you'll notice some options. These options help us edit the row and column settings. You tin can click and hold the first button to drag and relocate the row.

To add columns to the row, expand the hovering options and click Change layout. You tin can either choose from a preset column layout, or blazon in your own values. Click Update and close it when you lot're done.
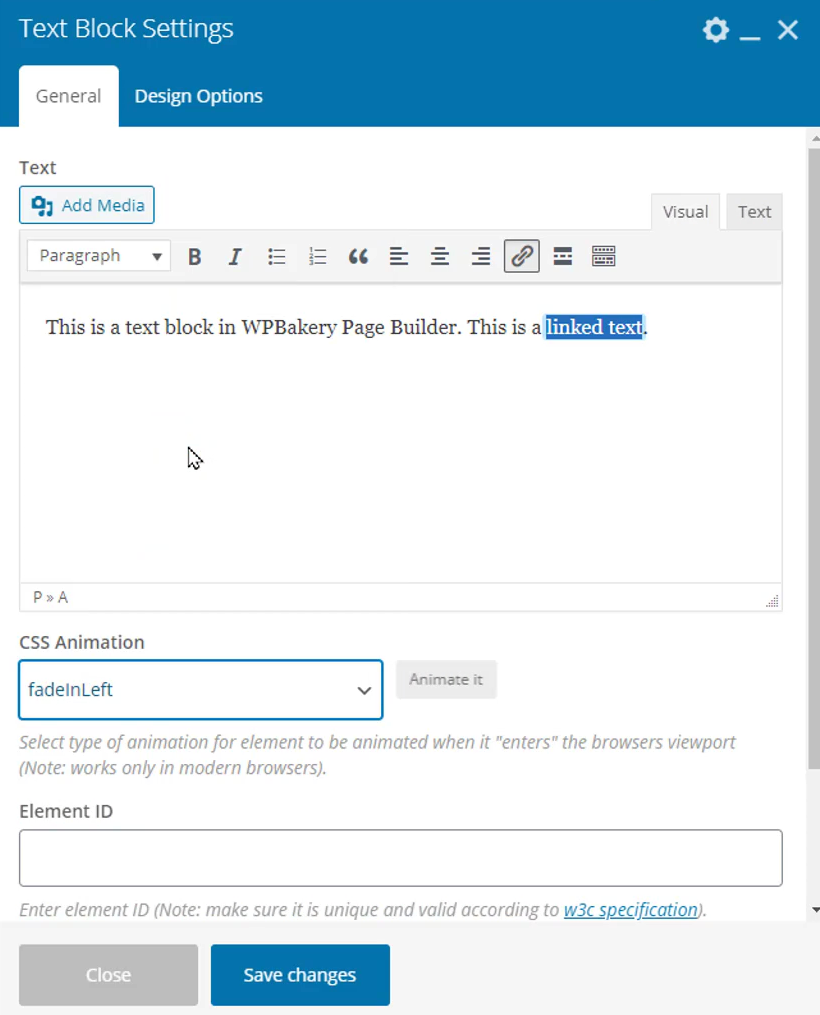
We can now add together two elements in these two columns. Whether you're a text block, a button, or anything else, the procedure is similar. Withal, you'll get to work with different general options depending on the element.
For instance, the text element has the post-obit general options:
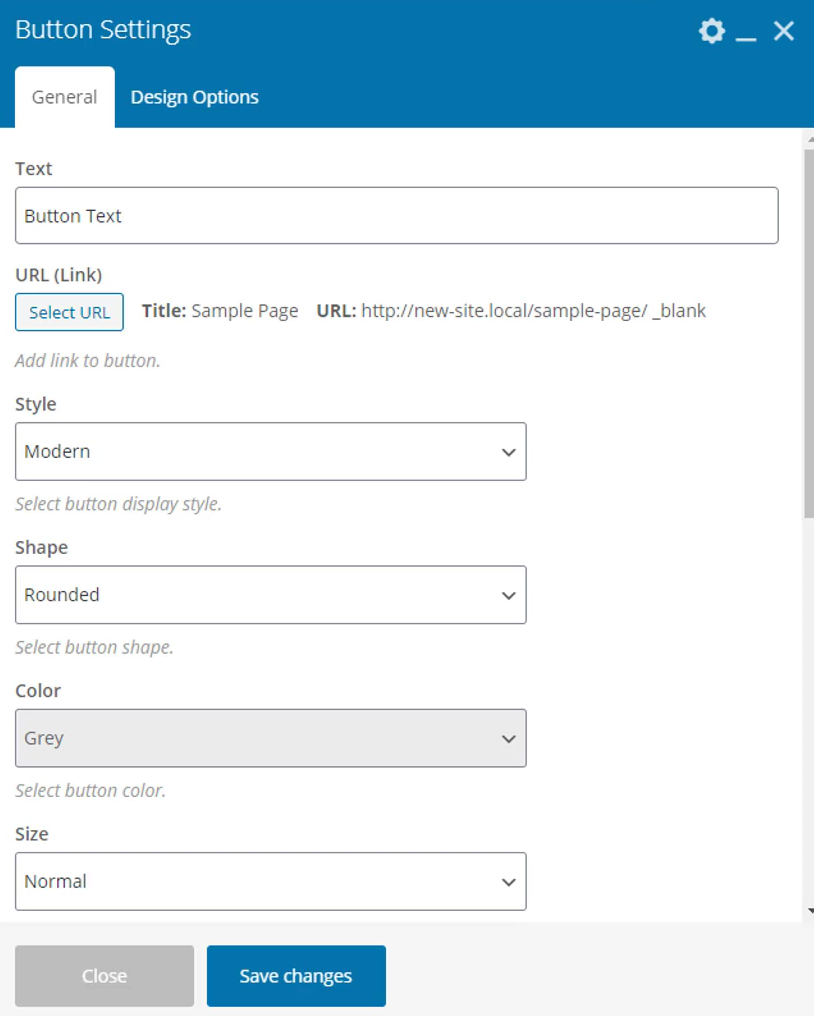
On the other hand, the button element has these general options for customization:
Before you publish, make certain the page works on all screen sizes. And if you lot're interested in using the Backend editor, the layout and principles are pretty much the same.
This is how you tin hands build your page one block at a time with the WPBakery Page Architect. Using just these simple steps, you lot can create stunning web pages. If you demand any assist, leave a comment below and we'll get back to you.
If you lot adopt a video version, delight check the video below:
Farther reading
- Complete Elementor Folio Builder Tutorial
- 10 Best WordPress Form Builder Plugins 2021

How To Use Templates In Wpbakery Page Builder,
Source: https://learnwoo.com/beginners-guide-wpbakery-page-builder/
Posted by: myersounfee.blogspot.com
0 Response to "How To Use Templates In Wpbakery Page Builder"
Post a Comment